

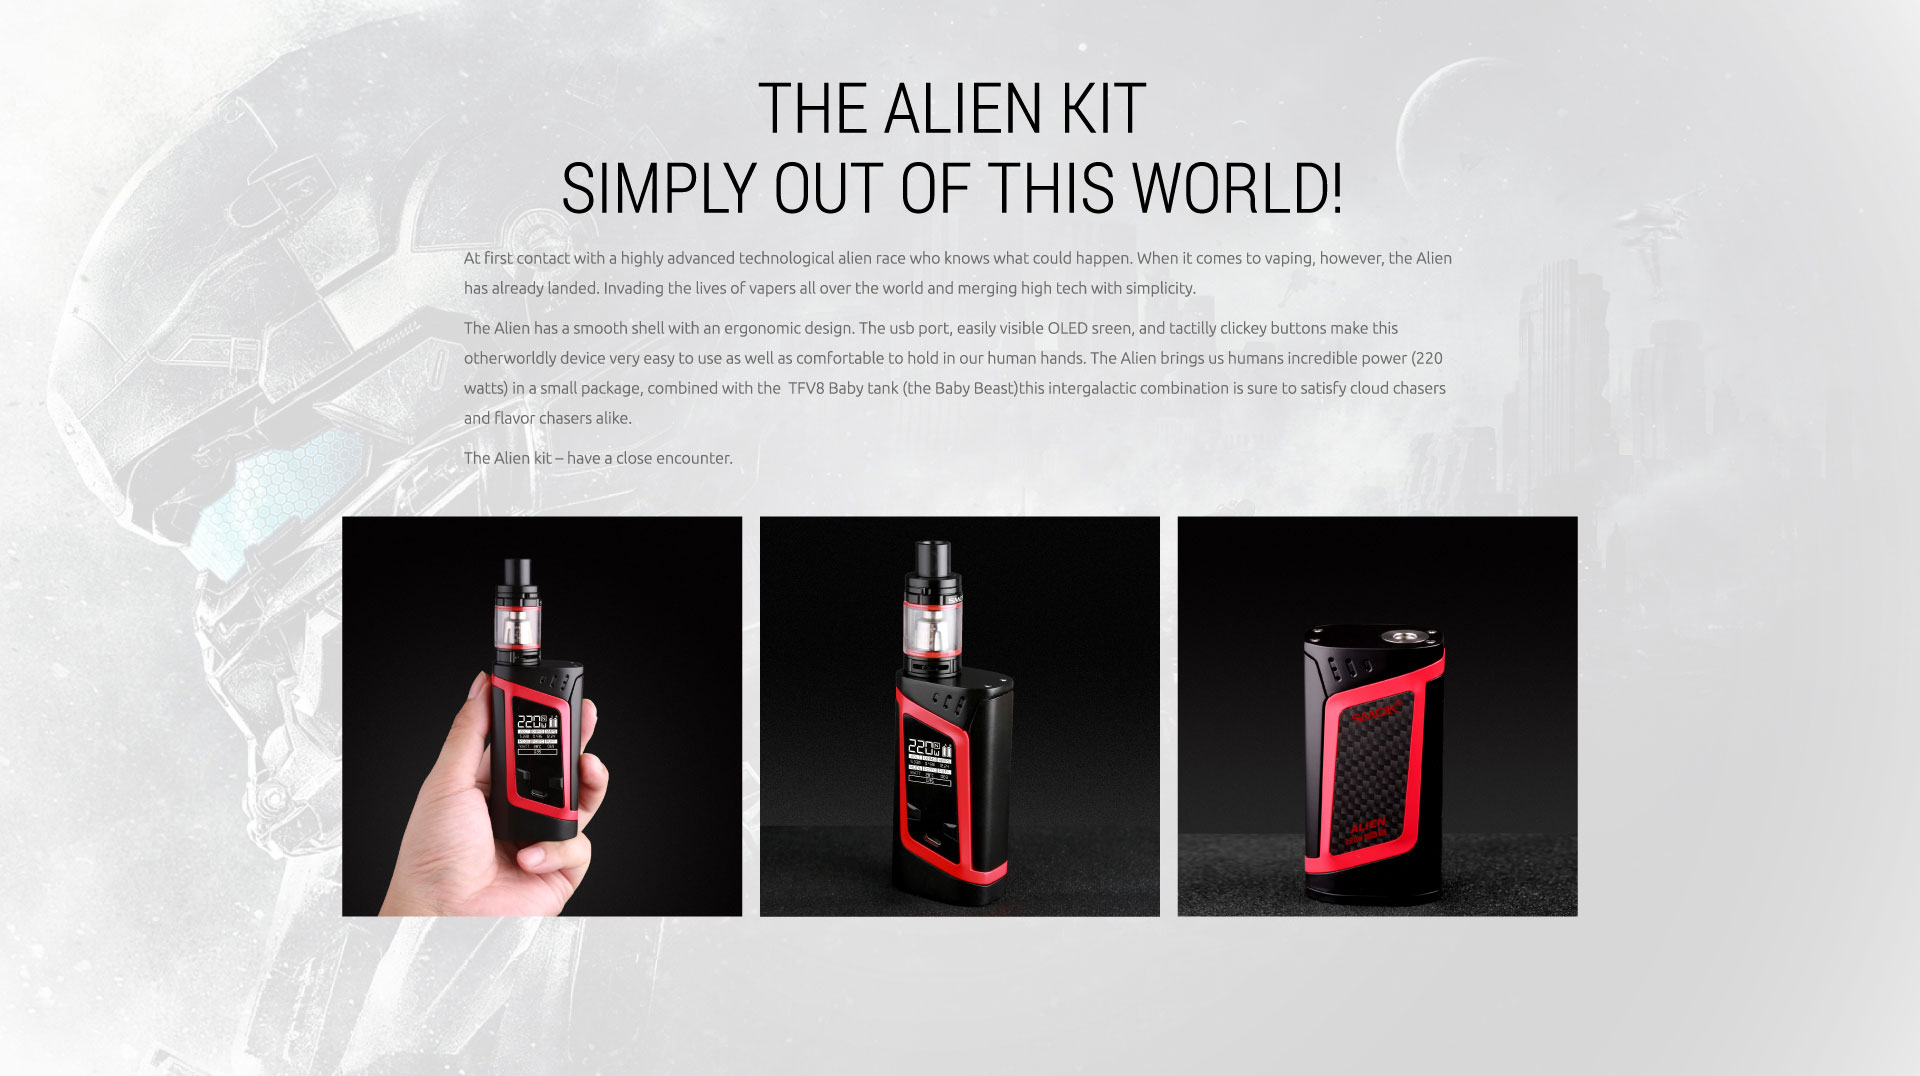
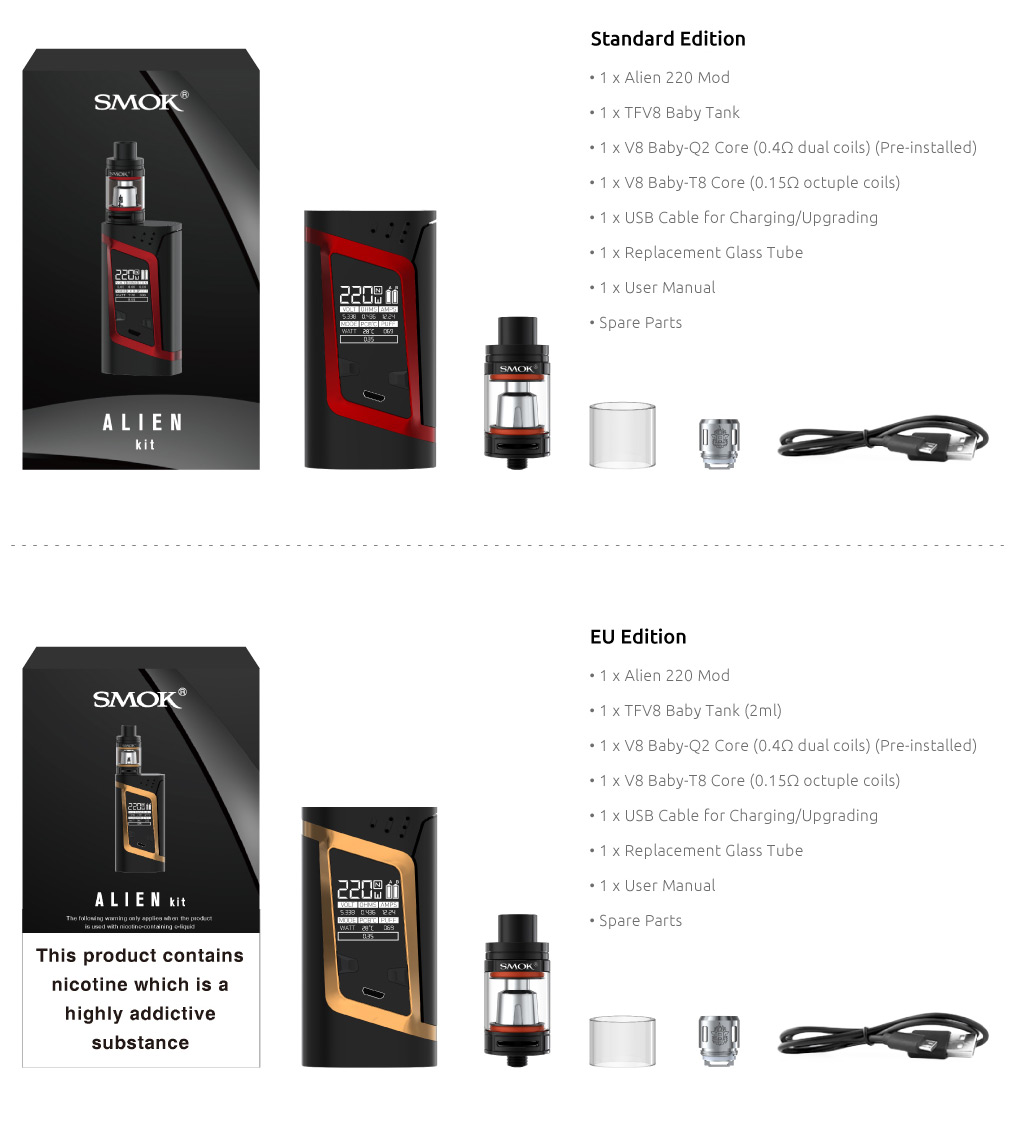
THE KIT INCLUDES
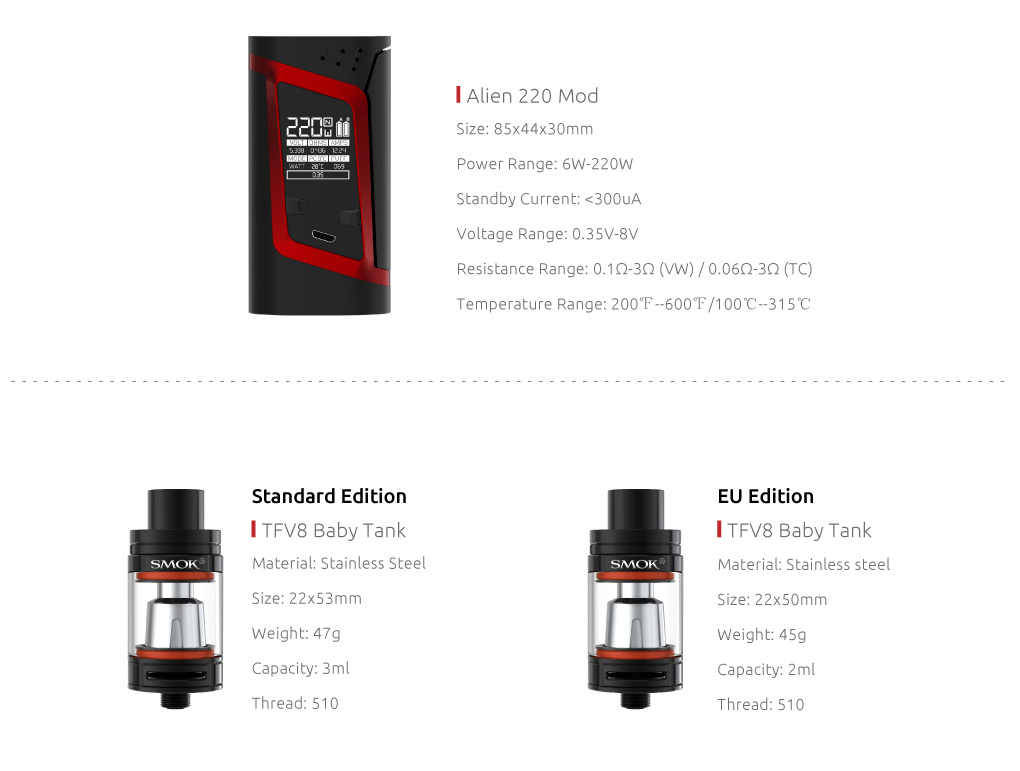
SPECIFICATIONS
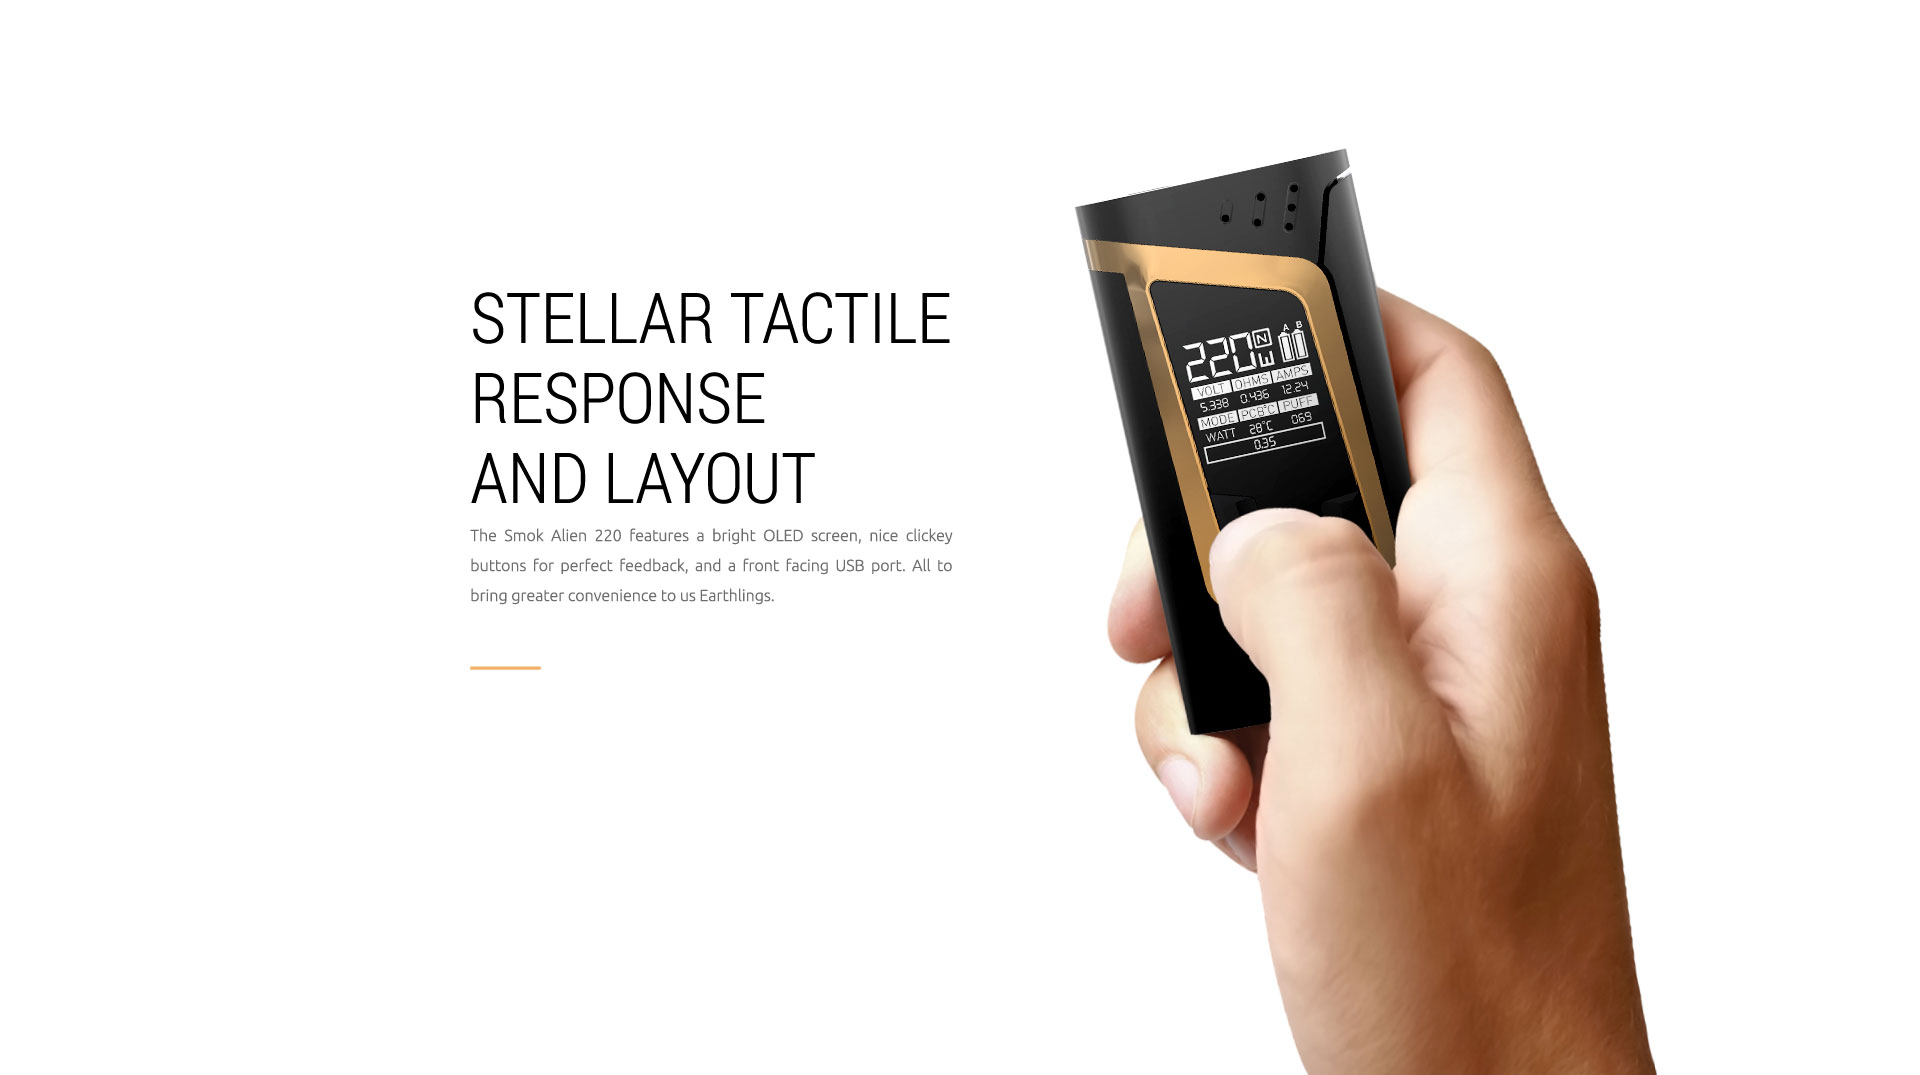
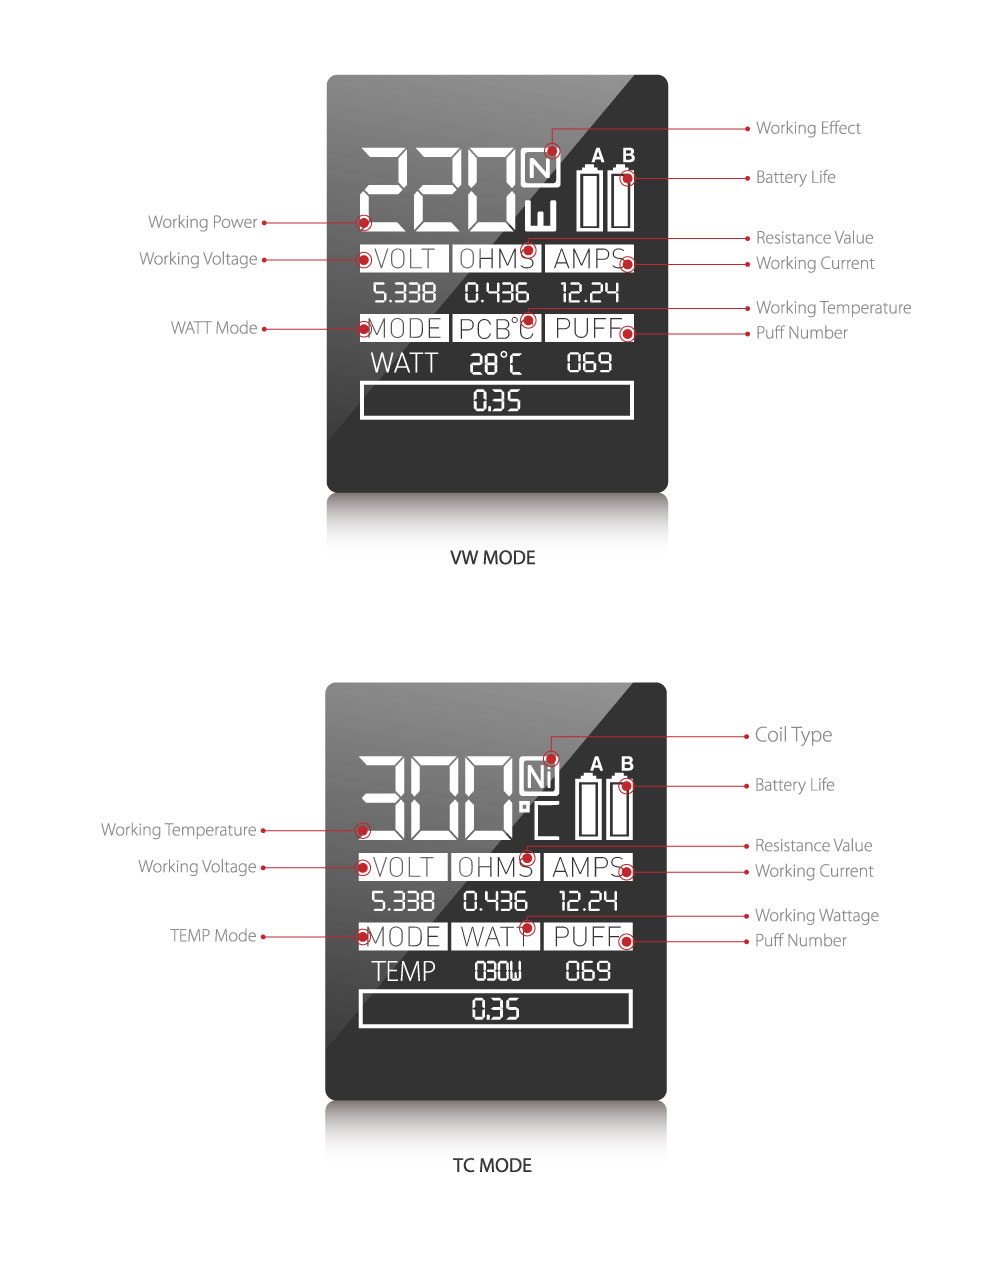
MORE DETAILED VAPING DATA
The clear and precise OLED screen offers an entirely new operation interface. More vaping data for
you, such as VW/TC MODE, vaping effect, voltage, battery life, resistance value etc.
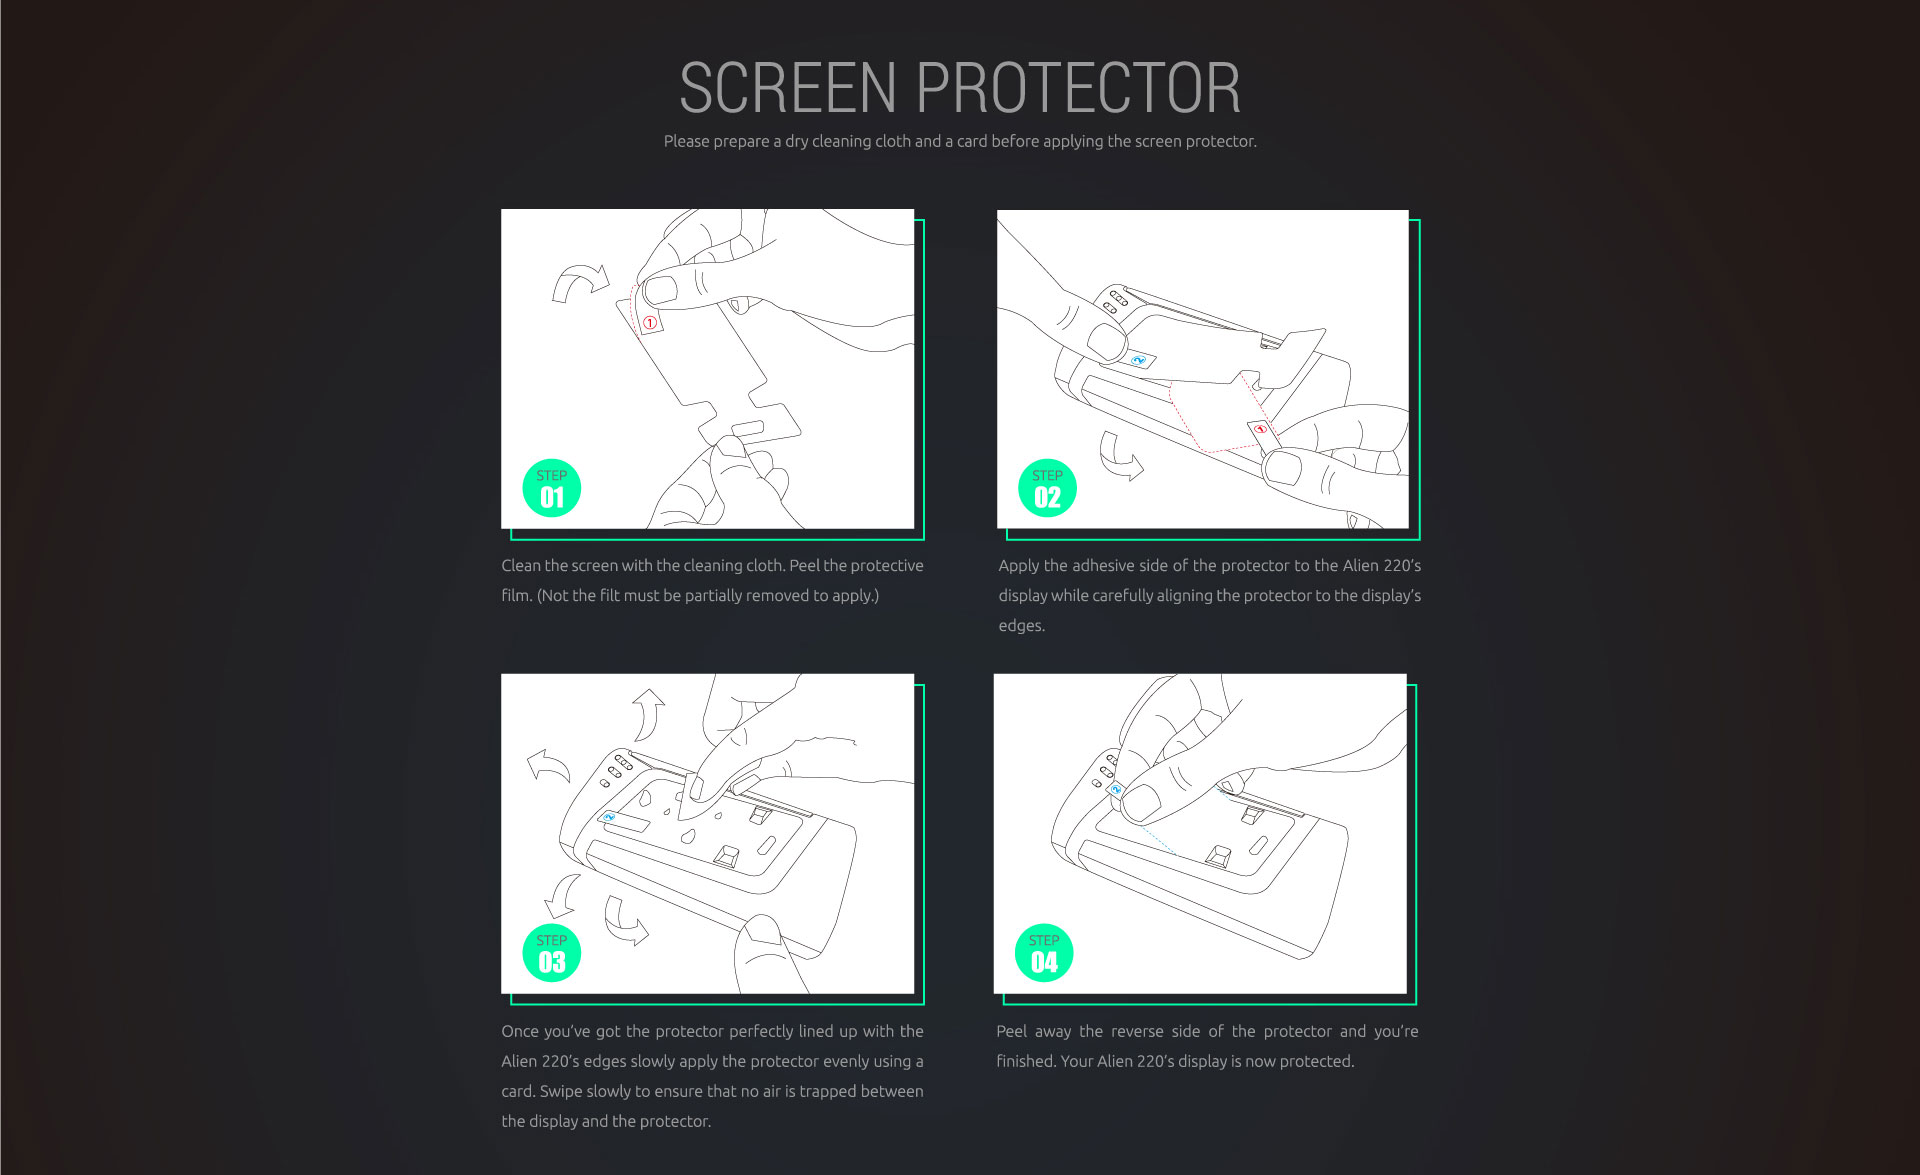
Tips: There is a transparent protective layer on this side, you can rip it
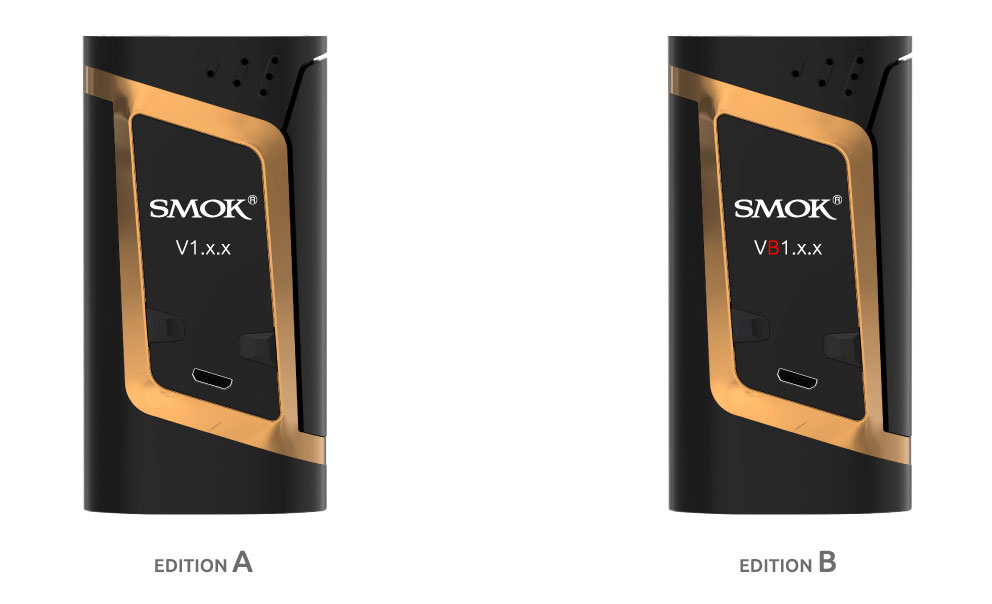
SPECIFICATION OF TWO
EDITIONS FOR ALIEN MOD
There are A and B two versions of Alien220 mod with the same function as for its improvement of
MCU. Edition A will display V1.x.x (newest is V1.2.11) when powered on, while edition B will display
VB1.x.x (newest is VB1.0.2). Please make sure the device version and download the corresponding
version before firmware upgrading, for A and B version is totally different and cannot be employed
universally. (You can brush up the device with the correct version if incorrect version is upgraded, and
unmatched firmware upgrading is not recommended as wrong update can result in a brick device,you
can flash your VB version Alien by
http://www.smoktech.com/support/upgrade/toolsandfirmware/ispalien )
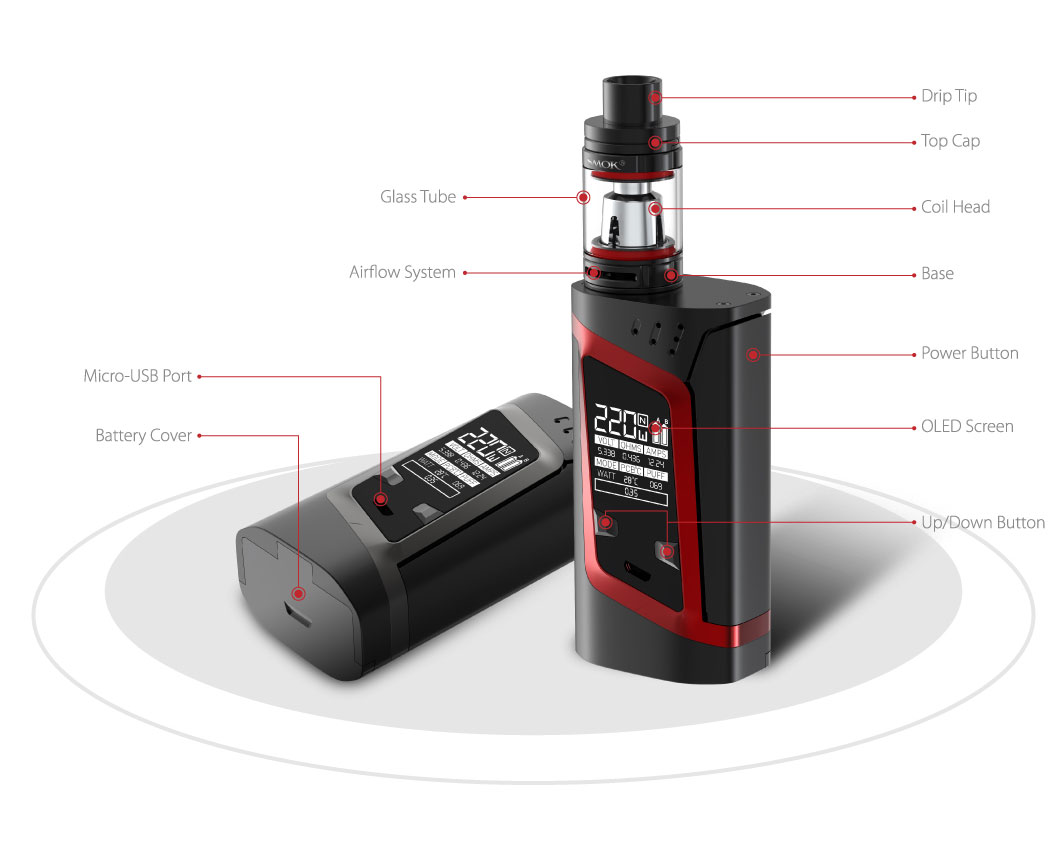
COMPONENTS
UPGRADE YOUR ALIEN MOD

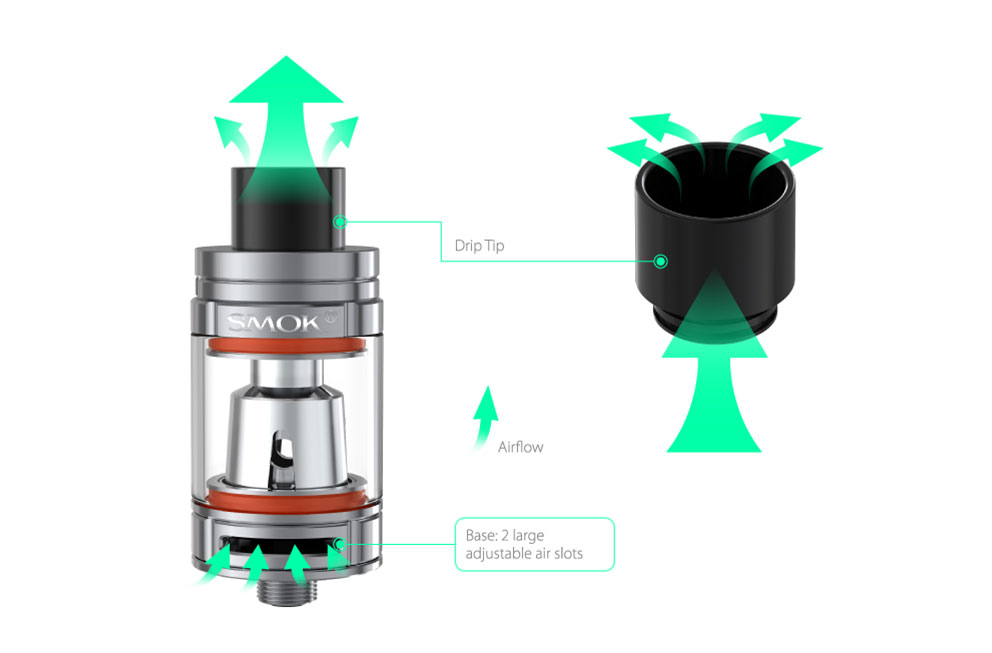
ADJUSTABLE AIRFLOW
SYSTEM
Bring you an extremely open draw. Airflow can be adjusted freely by turning the ring at the base of
atomizer.

BUILDING THE RBA
1. Be sure your hands are clean.
2. Disassemble the RBA deck.

3. Install and seat the pre-wrapped coil. Place the coil between the posts and wrap the ends around
the screws and tighten them to secure the coil. Be sure the coil is fixed in the center and that the coil


8. Prime your cotton by wetting it with e-liquid and adjust it’s position. (Be sure to check the
resistance of your coil before placing it under load. Furthermore check the coil’s resistance
periodically throughout it’s usage to monitor for any changes.)